
Archive for the ‘Hardware’ Category
Hard To Find Atrium Door Hardware
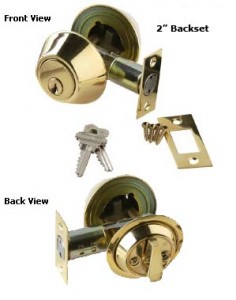 During the 1980’s, styles called for wooden patio doors with a maximized view. This was accomplished by using larger glass panels in the door; but, more glass meant reduced space in the wood frame for lock mounting. A company called Atrium came up with a solution that address that concern. The locksets were manufactured with a 2” backset. The name Atrium Door evolved from this company, and is still used to refer to those type of doors today. Newer Atrium doors used a mortise lock with the deadbolt and lever set in one mechanism. Atrium was eventually purchased by Amerock who continued to manufacture the National type locksets with a 2” backset. A few years ago Amerock discontinued the lock portion of their business. This left the Atrium Door Hardware very hard to find. 2” Backset Door Hardware can still be found with a little diligent searching. Horseshoe-Hardware has access to this type of hardware in many finishes. Atrium style mortise sets can be located by contacting their customer service.
Update Your Home with Track Lighting
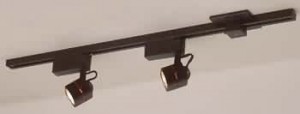 Lighting can make or break a room. The proper lighting can make a room seem light, bright and spacious. On the other hand, a single, dim light in a large room makes it seem uninviting. You can remedy this with lamps around the room, but those need to be turned on and off individually and are limited to the number of outlets in the room. An easier, more modern lighting solution is track lighting on the ceiling.
With track lighting, several lights are spaced out across the ceiling and can be adjusted to direct light at various parts of the room. This allows you to light the entire room from the ceiling with the flip of a single switch – no lamps to turn on and off or electrical cords to trip over. It can also replace an outdated light fixture to give the room a more modern look.
Hand-Carved Wood Accents Add Character
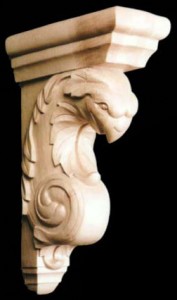 If you are planning a new kitchen, or just planning to remodel your existing cabinetry, one thing that will set your project apart from the mundane, is the finishing touch added by incorporating Hand Carved Hardwood Corbels and other hand-carved accents within your design. With a little planning, gorgeous results can be obtained without breaking your budget. Hard carving adds character and appeal not found with machine made goods. Skilled craftsmen rely on their talents to provide works of art that will be cherished for the ages. Investigate the possibilities before deciding on less artistic solutions, and create something truly unique in the process.
The Right Vanity Lights
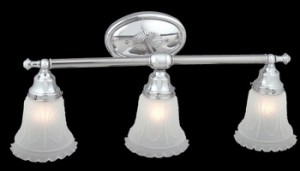 If your bathroom doesn’t have a skylight or large windows, it lacks natural light, which is the best for shaving and applying makeup. Some artificial lights have an unflattering, yellowish tinge to them, making you look sickly and tired in your own bathroom. To start your days off right, you should invest in soft white bulbs for a flattering glow. If your bathroom light fixtures are the problem, they may need to be replaced.
Installing new vanity lights can make a world of difference in your bathroom. The more light you have, the better, so replacing a single light with a row of three or four would be a monumental improvement. Make sure the fixtures are made of white frosted glass, not yellow, so they cast out a soft, flattering glow. Repainting your bathroom with a warm color, like a soft blush or beige, can also do wonders for your complexion.
Western Bathroom Decor Adds The Finishing Touch
No Western theme home is complete if the bathroom decor is overlooked. Cast iron horseshoes, stars, and western conchos can be crafted into beautiful pieces of nostalgic art, reminiscent of the Old West. The rustic beauty adds charm and charisma to any setting where Western Bathroom Decor is desired. Break away from the norm and add some western class to your bath.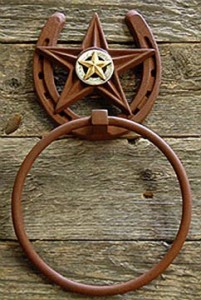
Decorative Garden Sprinklers
With the advent of warm weather season, why not adopt a decorative garden sprinkler to spruce up your lawn or garden. Decorative Sprinklers and Hose Bibs create interest, and are sure attention grabbers. Be it a cast brass snail, turtle, frog, or other adornment, these cute creatures will add a little bling to your yard and garden decoration.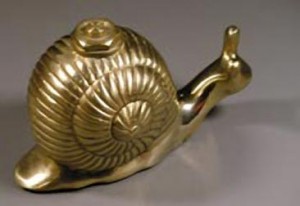
Inspirational Knobs For Aspiring Artists
Decorate your surroundings with famous icons of the art world. From the imagery of modern day artist Rosalie Sherman Designs, come cabinet hardware tributes to some of the world’s most renowned artists. These knobs are sure to motivate inspiration and creativity in your artistic environment.
The History of the Chandelier
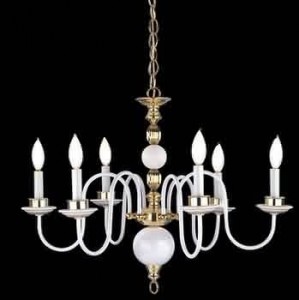
While the chandelier might just be something that you’ve always had in your dining room, it actually has a varied and interesting history. To that end, the first chandelier appeared in medieval times. It was basically a candle chandelier, meaning two pieces of woods were nailed together, and candles were secured to the ends of the wood pieces. With technological advances, the chandelier advanced right along as well. Today, it is typically thought of as a branched and decorative light fixture mounted to the ceiling.
No matter what time period they hail from or what region of the world, chandeliers are known for their complex collection of glass and crystal prisms. This often fills the room with vibrant colors and refracted light. Not surprisingly, some of the most decorative and ornate of all chandeliers hailed from France. Famous for their excess and opulence during the era of pre-Revolution Versailles, truly amazing chandeliers were a fixture among the palaces and castles of that day.
Making Potty Training Fun
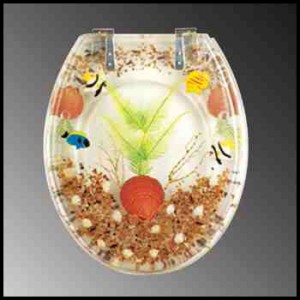
For a parent of a toddler, there’s nothing more vital that getting your kid quickly and properly potty trained. Not only is it a milestone for your kid, but it also relieves a lot of burden on your part. That’s why parents spend so much time and money trying to learn how to effectively and quickly potty train their children. But the simple fact is that kids are going to learn when they’re ready and no sooner.
But you’re not completely at the whim of the child. You can help make the process less scary and more fun by installing some decorative toilet seats. These can be covered in drawings of everything from sea life to dinosaurs. Pick something that is a favorite of your child. This way, they’ll have something to be excited about when they’re learning how to use the bathroom. And if you eventually want to return you bathroom to the look of a solid tone toilet seat cover, you can merely switch it out with minimal fuss.
Replacing A Toilet Seat Hinge
Many newer toilet seats come with plastic hinges. These are easy to maintain, and are functional, but many 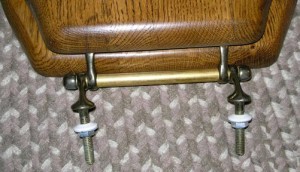 prefer the classic look that only Chrome or Brass Hinges offer. Installing a new hinge adds character, but it can be a bit daunting. Although most hinges for toilet seats are designed to mount on 5-1/2″ centers, the existing screw holes for attaching the hinge to the seat, most likely will not line up correctly. A dab of wood putty will fill the existing holes. A bit of paint or a stain pen should hide the patch in most cases. Turn the bottom portion of the seat upside down. Position the new hinge along the back edge and center using a ruler or tape measure. Use an awl to mark the position for the screws. Be sure to drill pilot holes for the screws. Use a depth gauge attachment to insure no mistakes. Be sure to check the screw length. Some hinge sets come with screws that may be too long for the depth of the toilet seat. Once the lower hinge is attached, it’s time to attach the upper hinge to the lid. This is where the job gets tricky. By positioning the lid atop the base, one can see that there is no easy way to mark the position of the upper screws. The solution to this is to get some tracing paper. Place the lid on the paper and trace the outline carefully. With scissors, cut out the template carefully. Now place the template on the lower seat atop the hinges. Center the pattern appropriately. Since tracing paper is somewhat transparent, you can see where the hinge holes need to be. Using a Sharpie, dot the position of the hinge holes carefully. Now turn the lid upside down. Remember to flip the template as well. Mark the top with the awl, drill pilot holes, and attach the top. Congratulations, you have now successfully finished your toilet hinge replacement.
