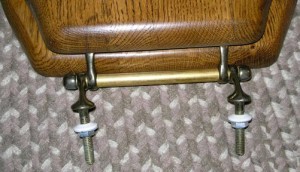

Replacing A Toilet Seat Hinge
Many newer toilet seats come with plastic hinges. These are easy to maintain, and are functional, but many  prefer the classic look that only Chrome or Brass Hinges offer. Installing a new hinge adds character, but it can be a bit daunting. Although most hinges for toilet seats are designed to mount on 5-1/2″ centers, the existing screw holes for attaching the hinge to the seat, most likely will not line up correctly. A dab of wood putty will fill the existing holes. A bit of paint or a stain pen should hide the patch in most cases. Turn the bottom portion of the seat upside down. Position the new hinge along the back edge and center using a ruler or tape measure. Use an awl to mark the position for the screws. Be sure to drill pilot holes for the screws. Use a depth gauge attachment to insure no mistakes. Be sure to check the screw length. Some hinge sets come with screws that may be too long for the depth of the toilet seat. Once the lower hinge is attached, it’s time to attach the upper hinge to the lid. This is where the job gets tricky. By positioning the lid atop the base, one can see that there is no easy way to mark the position of the upper screws. The solution to this is to get some tracing paper. Place the lid on the paper and trace the outline carefully. With scissors, cut out the template carefully. Now place the template on the lower seat atop the hinges. Center the pattern appropriately. Since tracing paper is somewhat transparent, you can see where the hinge holes need to be. Using a Sharpie, dot the position of the hinge holes carefully. Now turn the lid upside down. Remember to flip the template as well. Mark the top with the awl, drill pilot holes, and attach the top. Congratulations, you have now successfully finished your toilet hinge replacement.
Leave a Reply
You must be logged in to post a comment.